welcome
Web Programming Primer
-Lesson 7-
Spans, Divs, Positioning and Images
Spans and Divs are tags used to surround certain text or elements or groups of elements to style your page. For example,
if you want a sidebar on your page, you can create a div, and insert all of your text, images, and links inside that div. This
is helpful because it allows you to position elements, or groups of elements, exactly where you want them, and can allow you to style them
in the same way. They allow you to organize your page more simply.
Div stands for division and is a "block tag", not an "inline tag." This means that, for your XHTML to be valid,
You can not embed a div inside of a paragraph, instead, you would embed images, paragraphs, or links inside of the div.
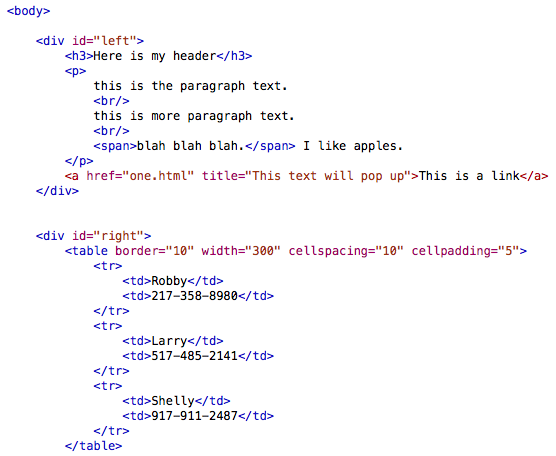
Here is an example:
The attribute "id" was given inside of the opening div tag to differentiate it from other divs on the page. You can set id
equal to any name you want to make for that div, and then in your CSS, you make a selector for it by starting with a pound sign
(#) and then typing the name you gave it. Inside curly brackets, any style you code will effect everything embedded in the div tags.
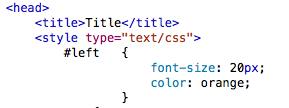
This is how you would style the div in the previous image:
(I am using internal stylesheets for my examples,
but external stylesheets work the same way)
So, now the header, the paragraph, and the link from the first image will be 20 pixels tall and orange. As you can see,
this makes it easier to customize elements on your page in groups.
Spans are similar to divs, but are used for in-line coding. For instance, if you have some text, inside of paragraph tags,
that you want to be different than the rest of the paragraph, you can single out that text with span tags.
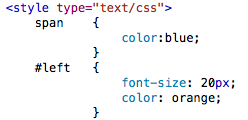
It would look like this:
To create multiple spans, simply code them as span, span1, span2, etc (do this for both the tag and the CSS selector)
You may have been wondering when we would enter into the great realm of positioning. The answer is, now. Divs allow us to position
elements around the page, exactly and precisely where we want them. The first thing we must take note of is that each element, unless
specified, has a relative positon it assumes on the page as you code. For example, when you create a paragraph, and then create a new paragraph, the new
paragraph skips a little space and then belongs to a new space. Each element you code works in this fashion. The elements
slowly line themselves down the left side of the page (because it is all by default, left-justified). But, we can overcome this; we can
tell our elements where to go on the page. To do this, we must add an attribute to our styling knowledge. This attribute is named
"position." You can set this attribute equal to "absolute," "relative," or "fixed." After this, you can insert two more attributes,
which are "left" and "top." You will set these equal to pixel values, and they will determine how far your div is away from the left and the top of the display window.
When you have a position of relative, your left and top pixel amounts will move your div from the starting point of where it would be on the page without any positioning change. If your
use this approach, you may have to deal with unwanted gaps in your page. However, if you have a position of absolute, the div will move in relation to the top left corner of the
display screen (and the next element in the code will take up the next relative space). This allows you to create overlapping. Relative and absolute are usually used in conjunction; websites won't use just one positioning value for every element.
Fixed positioning is less common. What it does is fixes an element on the screen in an absolute position, but stays in that spot, even when the page is scrolled up or down. One
use of this feature may be for sidebars.
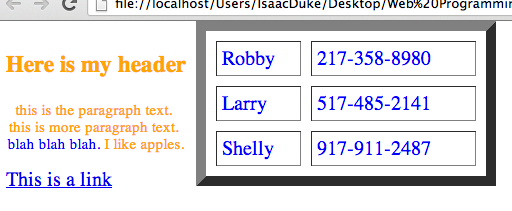
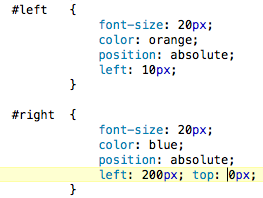
Test all this out for yourself. Here is an example for you:
When it comes to images, you are not limited to only inserting them in image tags, but you can insert them as
the background of an element as well, by using CSS. This brings us to the property "background-image," which is
similar to "background-color," as the both fill the background of an element. Background-color will have the value of
url(image_name.jpg);. Along with this, you will want to know "background-repeat," which you will most likely
want to set to "no-repeat."
It will look something like this:
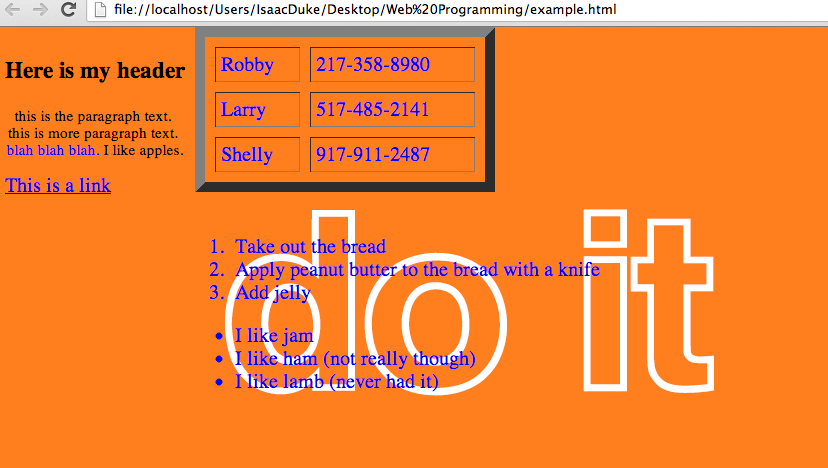
The orange "do it" picture in the image above was placed as the background-image of the body, so it fills the display. This
is not limited to just the body, but can be done to any element.




This page was constructed by Isaac Duke, a student of Anderson University, for an independent study in web programming.
This is not a fully comprehensive primer, so use in conjunction with other resources (resource page provided). The last
time this site has been updated was on August 20, 2013. If any questions, email misaacduke@gmail.com


